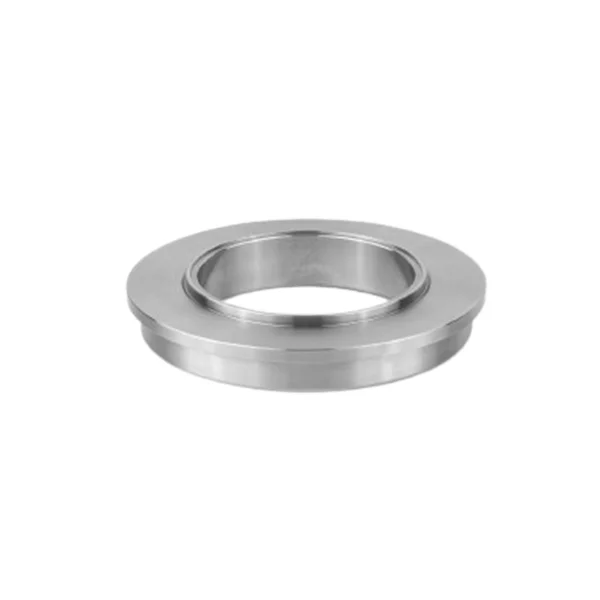
High precision machining plays a pivotal role in manufacturing components with stringent tolerances, superior surface finishes, and intricate geometries. The machining skeleton, often a foundational or intermediate structure in the fabrication of high-precision parts, requires a meticulously planned and executed production process. In this blog post, as a professional custom precision machining manufacturer, Okin will share the production process of high precision machining skeleton, including material selection, etc.
1. High Precision Machining Skeleton Material Selection and Preparation
The first step in producing a machining skeleton is the selection of an appropriate material based on mechanical properties, machinability, and application requirements. Common materials include:
- Aluminum alloys (e.g., 6061, 7075) for lightweight and corrosion-resistant components.
- Stainless steel (e.g., 316, 304) for strength and wear resistance.
- Titanium and superalloys for aerospace and high-performance applications.
- Engineering plastics (e.g., PEEK, Delrin) for non-conductive and low-friction needs.
Once the material is selected, it undergoes preliminary preparation such as cutting, stress relieving, and surface treatment to ensure stability during machining.
2. CAD Modeling and CAM Programming
The design of a high-precision skeleton starts with Computer-Aided Design (CAD) software, where engineers create a detailed 3D model with precise dimensions, geometric tolerances, and functional features. This model is then translated into machine-readable instructions using Computer-Aided Manufacturing (CAM) software, which generates toolpaths optimized for efficiency, accuracy, and tool longevity. Key considerations include:
- Selection of cutting tools and machining strategies (e.g., high-speed machining, adaptive clearing).
- Optimization of spindle speeds, feed rates, and depth of cuts.
- Avoidance of excessive tool wear and thermal distortion.
3. CNC Machining Processes
CNC (Computer Numerical Control) machining is the primary method for shaping the machining skeleton. The process may involve multiple operations, such as:
- Milling: Multi-axis milling (3, 4, or 5-axis) is used for complex geometries, pockets, and intricate features.
- Turning: CNC lathes produce cylindrical parts with high precision, often complemented by live tooling for additional features.
- Electrical Discharge Machining (EDM): For intricate details and hard-to-machine materials.
- Grinding and Honing: For ultra-fine surface finishes and tight tolerances.
Throughout these operations, real-time monitoring systems track deviations and ensure precision is maintained within microns.
4. Workholding and Fixturing
To maintain accuracy, custom-designed fixtures, vacuum chucks, or magnetic clamps secure the workpiece. Advanced techniques such as hydraulic clamping or zero-point workholding systems further enhance positional repeatability and minimize setup errors.

5. In-Process Quality Control
Throughout machining, in-process metrology is employed to verify dimensional accuracy. This involves:
- Coordinate Measuring Machines (CMM): To validate geometric tolerances.
- Laser Scanners: For non-contact profiling.
- On-Machine Probing: To make real-time adjustments and correct deviations.
These quality control methods prevent defects and ensure compliance with industry standards (e.g., ISO 9001, AS9100 for aerospace parts).
6. Heat Treatment and Surface Finishing
Post-machining processes enhance mechanical properties and durability. Common treatments include:
- Heat Treatment: Processes like annealing, quenching, and tempering improve material hardness and toughness.
- Anodizing and Coating: Aluminum parts may undergo anodization for corrosion resistance, while steel components may receive PVD coatings for wear resistance.
- Polishing and Buffing: To achieve ultra-smooth surfaces, especially for aerospace and medical applications.
7. Final Inspection and Testing
The final stage involves rigorous quality assurance to ensure the machining skeleton meets all specifications. This includes:
- Dimensional Inspection: Using high-precision gauges, optical comparators, and micrometers.
- Surface Roughness Analysis: To verify finishes meet required Ra (roughness average) values.
- Functional Testing: If applicable, ensuring the part performs as intended in real-world conditions.
8. Packaging and Delivery
Once approved, parts are carefully cleaned, packed in protective materials, and shipped according to client requirements. For highly sensitive components, vacuum-sealed or nitrogen-purged packaging may be used.
Conclusion
The production of high precision machining skeletons demands a systematic approach integrating material science, advanced machining techniques, and stringent quality control. By leveraging state-of-the-art CNC machining, metrology, and finishing processes, manufacturers can achieve the high accuracy and reliability required in industries such as aerospace, medical devices, and high-performance engineering. Mastering these processes ensures that precision components meet the demanding standards of modern manufacturing.
www.okinmachining.com
Okin

